
6 Simple Pumpkin Adorning Concepts For Youngsters

Our youngsters are very a lot into the standard Jack-O-Lantern-style pumpkin carving, usually attempting to make a scarier, grosser, or goofier face than final Halloween. However we nonetheless bear in mind a time when toddler-friendly (even baby-friendly!) pumpkin “carving” was the secret over right here. So we needed to spotlight six easy, enjoyable, however unconventional pumpkin adorning concepts for youths that we’ve used up to now. Together with a “romantic” one we made pre-kids (sure, I’ll pause when you ponder what precisely might be romantic a couple of pumpkin…).
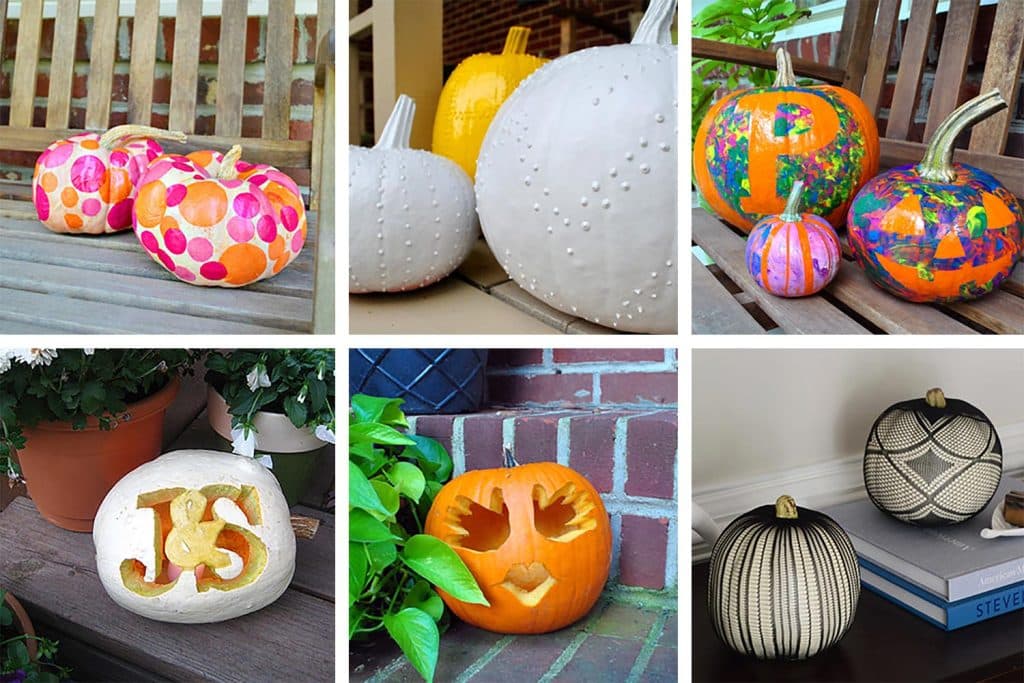
We’ve included a quick description of every beneath, however it’s also possible to comply with the hyperlink to the unique posts for extra pictures and particulars about every pumpkin-carving mission.
“Child’s First” Handprint Pumpkin
Supplies Wanted:
- Paper or cardstock
- Pencil or pen (for tracing available)
- Sharpie or marker (for tracing onto pumpkin)
- Scissors
- Pumpkin carving instruments
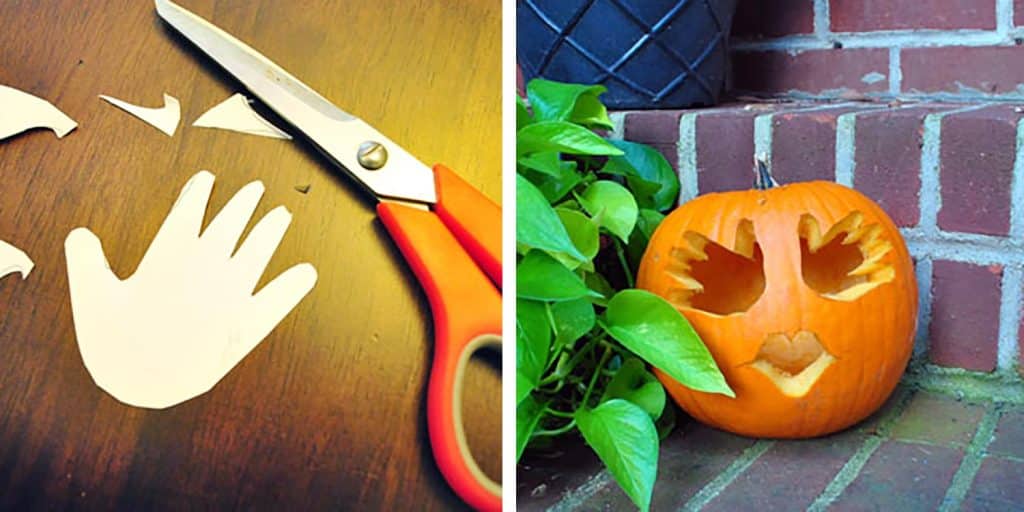
Our daughter was solely 5 months outdated by the point her first Halloween rolled round, which means there wasn’t a lot she may do to help within the pumpkin adorning course of. However she nonetheless participated in that yr’s carving by doing actually simply that: lending a hand. We traced each of her little palms and used them as do-it-yourself stencils on our pumpkin. In our mission, they turned the eyes of our Jane-O-Lantern (Jacqueline-O-Lantern?) however that half is as much as you. They could possibly be butterfly wings, humorous ears, and even simply palms! Take a look at the total handprint pumpkin tutorial right here.
Finger Painted Stencil Pumpkins
Supplies Wanted:
- Painters tape
- Sharpie or marker
- Craft knife
- Finger paints
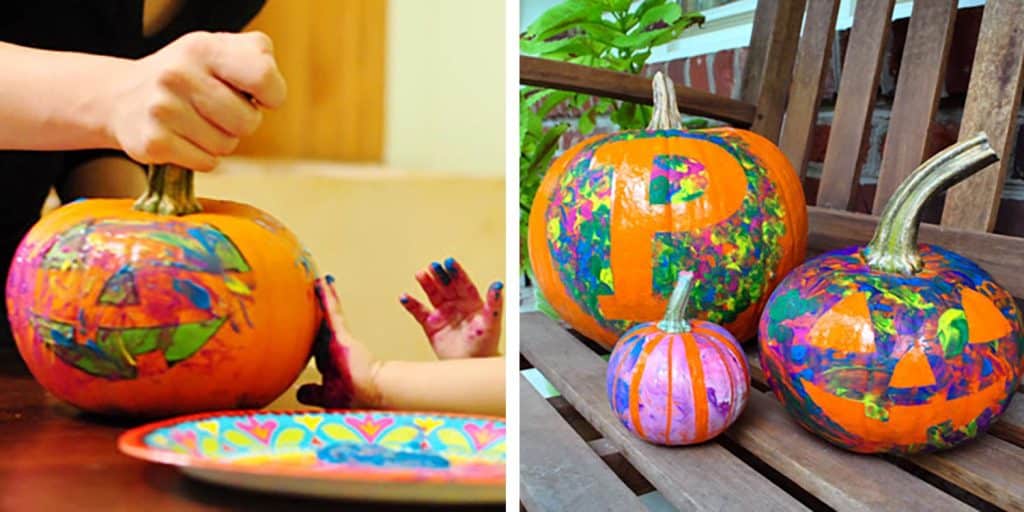
The next yr, we used a barely extra hands-on method to contain our daughter within the pumpkin adorning course of. She was already into finger-painting on paper, so we simply tailored the exercise to a brand new floor. Earlier than unleashing the paint, nevertheless, we used painter’s tape, a marker, and a small craft knife to use some designs to every pumpkin so that when the paint had dried, we may reveal some distinct designs or patterns on every pumpkin. And looking back, had we used fake pumpkins we may’ve stored these to interrupt out once more the next yr. See the total finger-painted pumpkin mission right here.
Puffy Painted “Studded” Pumpkins
Supplies Wanted:
- Puffy paint
- Craft or latex paint (even leftover home paint works)
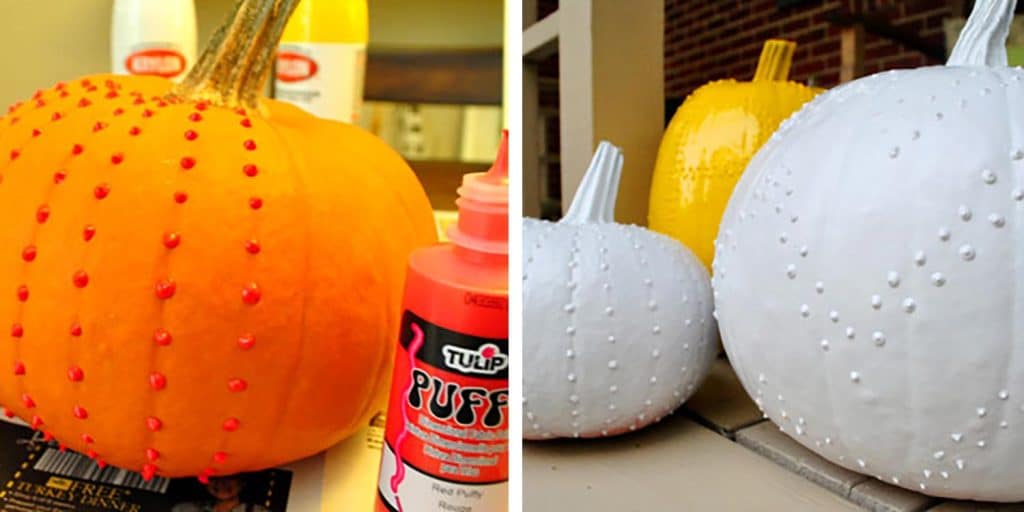
This can be a craft we accomplished pre-children, however it will nonetheless be a terrific one to get younger youngsters concerned in. Merely use puffy paint so as to add a design, texture, or sample to the surface of your pumpkin. We selected to do rows of dots on ours – making stripes, chevrons, and a monogram (we have been very into monogrammed pumpkins on the time, apparently) – however you possibly can do the identical with strong strains of puffy paint. As soon as it has dried, paint the complete pumpkin with a strong coloration to create a classy, textured look. See the total puffy painted pumpkin step-by-step right here.
Tissue Paper Mod Podge Pumpkins
Supplies Wanted:
- Colourful tissue paper
- Mod podge
- Scissors
- Paint brushes
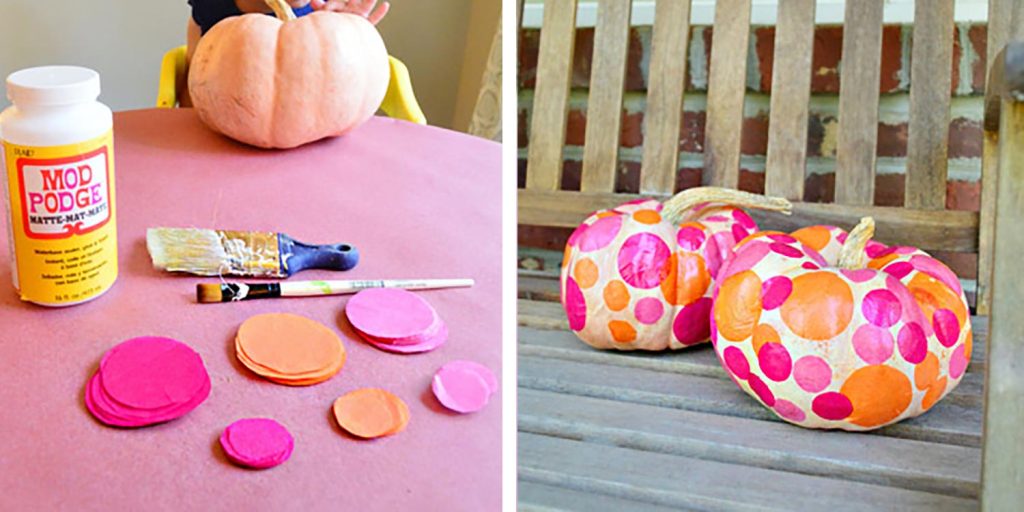
We determined to repurpose some leftover tissue paper for this mission. We reduce three colours of tissue paper into circles, some huge and a few small. Then we (the adults) coated the pumpkin in a skinny layer of Mod Podge to make it sticky sufficient that our daughter (who was 2 on the time) may place the tissue paper dots wherever she appreciated. As soon as she was completed, we coated the entire thing once more to “seal” the paper to the pumpkin. This mission has so many prospects – colours, shapes, patterns, and many others – and in case your baby is sufficiently old, they’ll partake within the chopping of the tissue paper! See the total tissue paper pumpkin tutorial right here.
Gothic Panty Hose Pumpkins
Supplies:
- Black fishnet panty hose
- Scissors

This can be a bizarre one, but it surely keep on with me. It’s additionally ridiculously quick! We stumbled upon some black fishnet pantyhose on clearance on the retailer, and thought it will be enjoyable to strive for a Halloween craft – particularly since lace-looking pumpkins have been all the craze that yr. All we did was shove the pumpkin in a single leg, stretching the design over the floor and revealing the sample. Then we reduce off the surplus and so they naturally shrunk tightly across the high and backside of the pumpkin. Clearly, these are finest to dislpay indoors – and we expect they appear particularly nice on white pumpkins. See the whole pantyhose pumpkin mission right here.
Do-it-yourself Stencil Monogram Pumpkin
Supplies Wanted:
- Pc
- Printer
- Paper
- Pencil
- Marker
- Pumpkin carving instruments
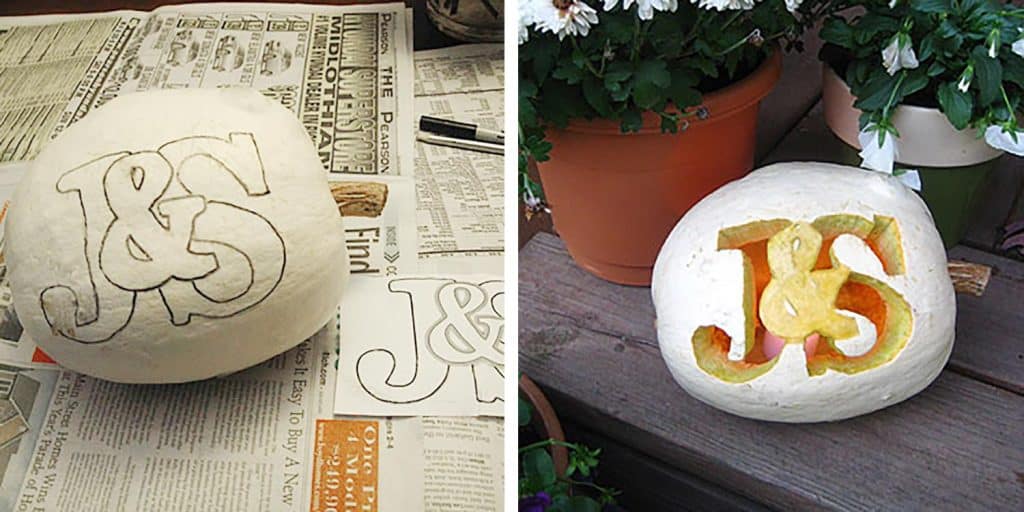
Like I mentioned, we apparently have been very into monograms again within the day? However this explicit mission exhibits how one can simply make your individual do-it-yourself stencil. We simply printed out a design, lined the bottom of the paper in pencil, pressed it in opposition to our pumpkin, and traced over our design with strain. This transferred the design frivolously onto the pumpkin’s floor, which we then carved as regular. This system can be utilized with any do-it-yourself or DIY sample – we even used it for a extra intricate design within the publish! Click on right here for the total monogram pumpkin stencil tutorial.
So there you’ve it! Perhaps I’ll share these with our (now a lot older) youngsters this yr to see in the event that they spark any new pumpkin adorning concepts of their very own. Both means, I’m positive we even have some zany hand-carved Jack-O-Lanterns in our future once more!


